

Web Application Setup
To add a new web application, go to Settings > Organization Setup. At the top right of the list of Applications, select Web from the Add an App menu.

--
Web Application Setup Wizard Overview
The Progress Bar
The setup wizard contains 5 steps across 3 phases.

--
- The header at the top of each page indicates the active step, and your progress towards completion.
- You can navigate between steps using the Previous and Next buttons, or by clicking on the icons or step step names beneath them.
- You can save your progress and exit at any time, using the Save Progress & Close button in the top right corner of the page.
- The Need Help? link opens additional application setup support documentation (in a separate browser tab).
Additional Support
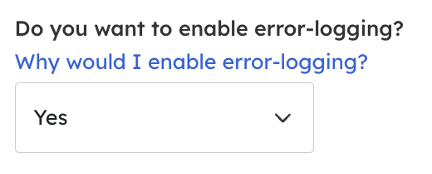
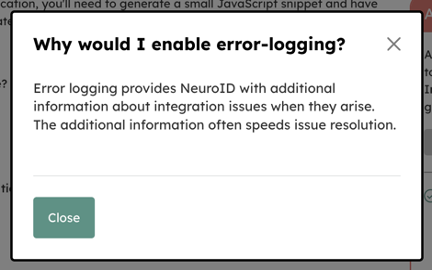
Throughout the wizard, you’ll encounter several other links to support content. Some are targeted links to specific areas of the support documentation mentioned above, but most provide in-context guidance on how to answer a particular question or complete the step you're on. An example is shown below.
--
The Application Dropdown
On all steps other than About Your Application(s) (that covers settings for all of your applications in one view), you'll need to select the application that you want to view/select settings for in the Application dropdown located under the left side of the Progress Bar. This will allow you to configure each application with the most appropriate settings.
Each application will be listed in the dropdown menu twice, once followed by "- LIVE" and again by "-TEST." This allows you to configure settings for Test and Live environments separately, so you can see if changes are working as expected before making them in a production environment.
Initiation
About Your Application(s)
The first step collects some basic info about your applications including their names, types and feature sets, and generates the default JS snippet you'll need for installation.
The names you choose here will be used to identify your applications in other areas of the portal including dashboards, status pages, and reports. Since some of these features may be used by non-technical members of your team, it's best to choose a name that will be meaningful to as many people as possible.
Based on the options you choose, you may be asked to answer one or more questions regarding the product set and features to employ.
In most cases, you'll need to set up a Data Collection application (to listen for events), and at least one Use Case application for generating signals for a particular use case (ex: login, onboarding, sending money) based on your collected data.
Use Case applications require a related Data Collection application but the reverse may not always be true.
After you’ve chosen the most appropriate settings for your application(s), you’ll need to generate JS snippets to be installed within your application. To do this, click the Generate Snippets button located in the Additional Required Steps section. Test and Production snippets are generated for each application. Each can be viewed and then copied to your clipboard, or downloaded as a .txt file.
After installing the applicable snippet(s), click the Next button to continue.
Viewing/Editing Initiation Settings
There are two ways to re-enter Application Setup to view/edit the Initiation settings.
- Go to Settings > Organization Setup, find the application you want to edit in the Applications list, and select Edit Settings from that application’s action menu.
- While viewing any Application Summary page, click the pencil icon for the relevant section.
To save your changes, you can click the Save & Close button in the top right corner of the page. If you make changes and navigate to another step in the workflow, a modal will open asking you whether you want to keep or clear your changes. Changes to Initiation settings become active immediately after saving them.
Installation
Customize JavaScript
The second step provides the ability to customize the JavaScript that was generated in the first step to best suit your circumstances. This is optional and you can proceed with the default settings, and return to make changes at a later date.
The Basic tab contains the more commonly altered preferences including:
- Setting the JS Version (defaults to the most recent version)
- Auto-Start (defaults to on where applicable)
- Auto-Identify (defaults to off)
The Advanced tab contains additional preferences related to:
- Selector inclusions/exclusions
- Capturing device orientation data
- XMLHttpRequest timeouts
- Data submission and event queue clearing thresholds
- Using a custom cookie domains
- Cookie expiration
- Window and device throttle times
After you’ve chosen (and saved) the most appropriate settings for your application, they will be applied instantly. If you try to move to another step with unsaved changes, the wizard will prompt you to save or cancel your changes before moving on.
Link Data to People
In this step, you’ll set an identifier that will be used to retrieve Neuro Confidence Scores and Neuro Attributes from NeuroID's API. This step does not require any action within the portal. Follow the instructions on the page, and when finished, click the Next button to continue.
Exercise Your App
Exercising your application allows you to verify (in real-time) that the JS was installed correctly, and that NeuroID is receiving the events needed to process and analyze your data.
The Real-Time Tracker (see below) lists the events NeuroID is looking for, their observation status and information regarding what was observed (if applicable). NeuroID does not need to observe every event for you to continue, however generally speaking, the more events observed, the more likely you are set up correctly. The tracker also provides additional information for each event to help you decide which are important to observe for your situation.
To begin, click the Start Exercise button. As you work through the normal flow(s) of your application, the table will begin to populate. When enough of the events have been observed to indicate confidence your JS is installed correctly, click End Exercise and then click the Next button to continue.
Note that although NeuroID will retain the underlying event data, the information shown in the tracker is not retained. If you leave and return, you’ll need to re-exercise to view what is currently observable.
Viewing/Editing Installation Settings
There are two ways to re-enter Application Setup to view/edit the Installation settings.
- Go to Settings > Organization Setup, find the application you want to edit in the Applications list, and select Edit Settings from that application’s action menu.
- While viewing any Application Summary page, click the pencil icon for the relevant section.
To save your changes, you can click the Save & Close button in the top right corner of the page. If you make changes and navigate to another step in the workflow, a modal will open asking you whether you want to keep or clear your changes. Please note that changes to Initiation settings become active immediately after saving them.
Inspection
Submit for Review
Once you’ve completed the Initiation and Installation phases, you can submit your application for review by a member of the Implementation Engineering team. The reviewer will check to make sure everything done so far looks okay and if so, will assist with:
- Identifying your application’s target fields
- Defining your application’s structure
- Mapping targets
- Going live with your configuration
Optionally, you can include a message for the reviewer in the provided area, or email screenshots and other relevant information to [email protected].
Application Summary
Each application has its own Application Summary page that contains some additional information about the application, entry points to edit its configuration and a toggle for enabling and disabling it.

--
To visit an application’s summary page, visit the Organization Summary page and click its name in the list of applications, or select View Application Summaryfrom the application’s action menu.
Updated 6 months ago