iOS SDK 3.6.x
SDK v3.6.x Requirements
- iOS 13 or later.
- A minimum of 5MB of installation space.
- Installation using either:
- CocoaPods (requires Ruby v3+)
- Swift Package Manager. See below for details.
- To integrate with NeuroID's services, you must whitelist the following domains:
- https://scripts.neuro-id.com/ - The subdomain that is hosting the NeuroID JavaScript assets.
- https://advanced.neuro-id.com/ - The legacy subdomain that is hosting the device and network assets.
- https://dn.neuroid.cloud/ - The upgraded subdomain that is hosting the device and network assets.
- https://receiver.neuroid.cloud/ - The subdomain that is receiving behavior events via POSTs.
Installation
Reference the following Recipes for examples of successful NeuroID SDK integrations.
Adding the NeuroID SDK to the Project
CocoaPods Installations
Add the NeuroID SDK Pod to your project's Podfile, pinned to the version you wish to use.
To remain on the latest version when a new one is released, you can point directly to the NeuroID Github repository and set the tag to latest. To see available versions, please visit Release Versions.
target 'Your App Name' do
   # Point to specific Pods version
   pod 'NeuroID', "X.X.X"

   # Point to latest version via github
   pod 'NeuroID', :git => 'https://github.com/Neuro-ID/neuroid-ios-sdk.git', :tag => 'latest'
end
Swift Package Manager Installations
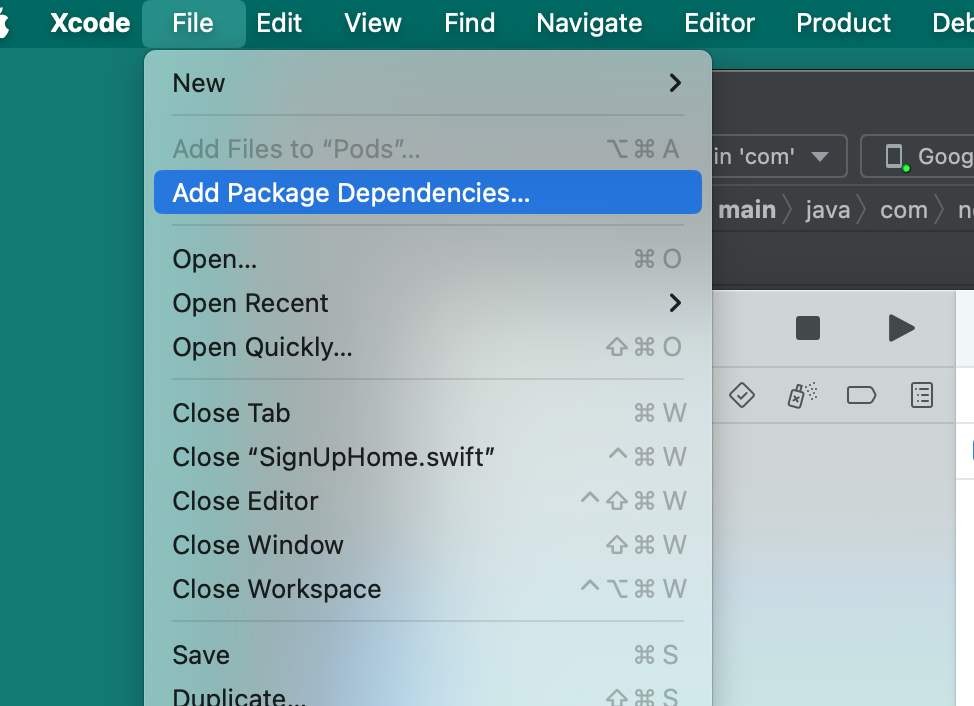
Start up Xcode and select Add Package Dependencies from the File menu.

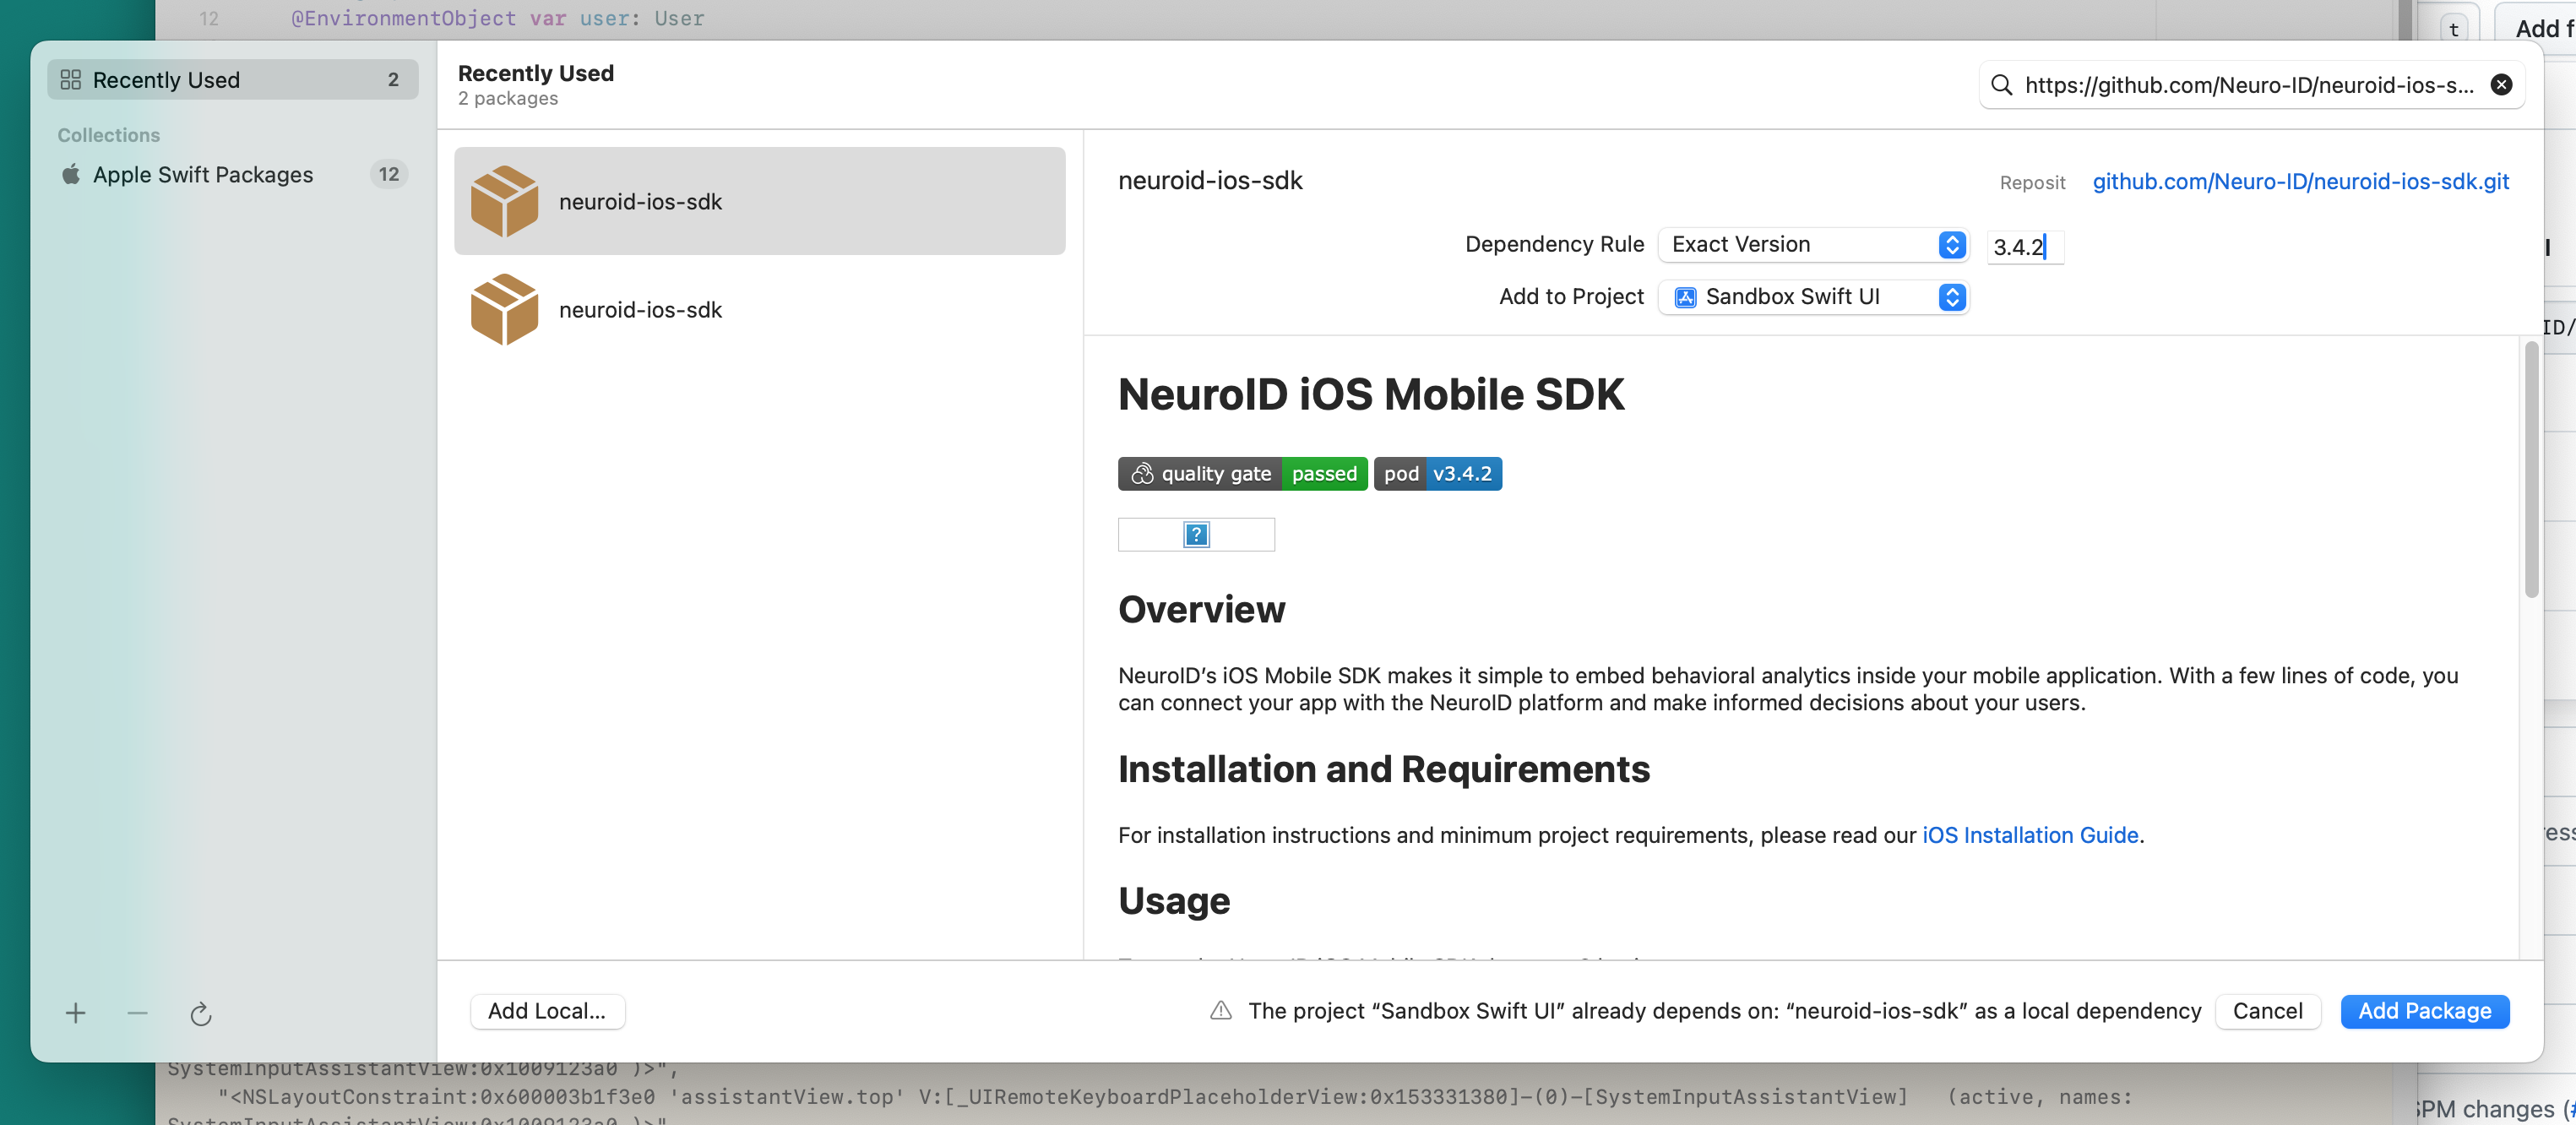
On the Swift Package Manager screen, use the search field in the upper right-hand corner to search for https://github.com/Neuro-ID/neuroid-ios-sdk.git. You should see the neuro-ios-sdk package.
In the Dependency Rule field, choose "Exact Version" and enter the latest version. Version 3.4.2 is the first version to support Swift Package Manager. To see all available versions, visit Release Versions).
In the Add To Project field, choose the project you want to add the NeuroID SDK to.

Next, click the Add Package button.
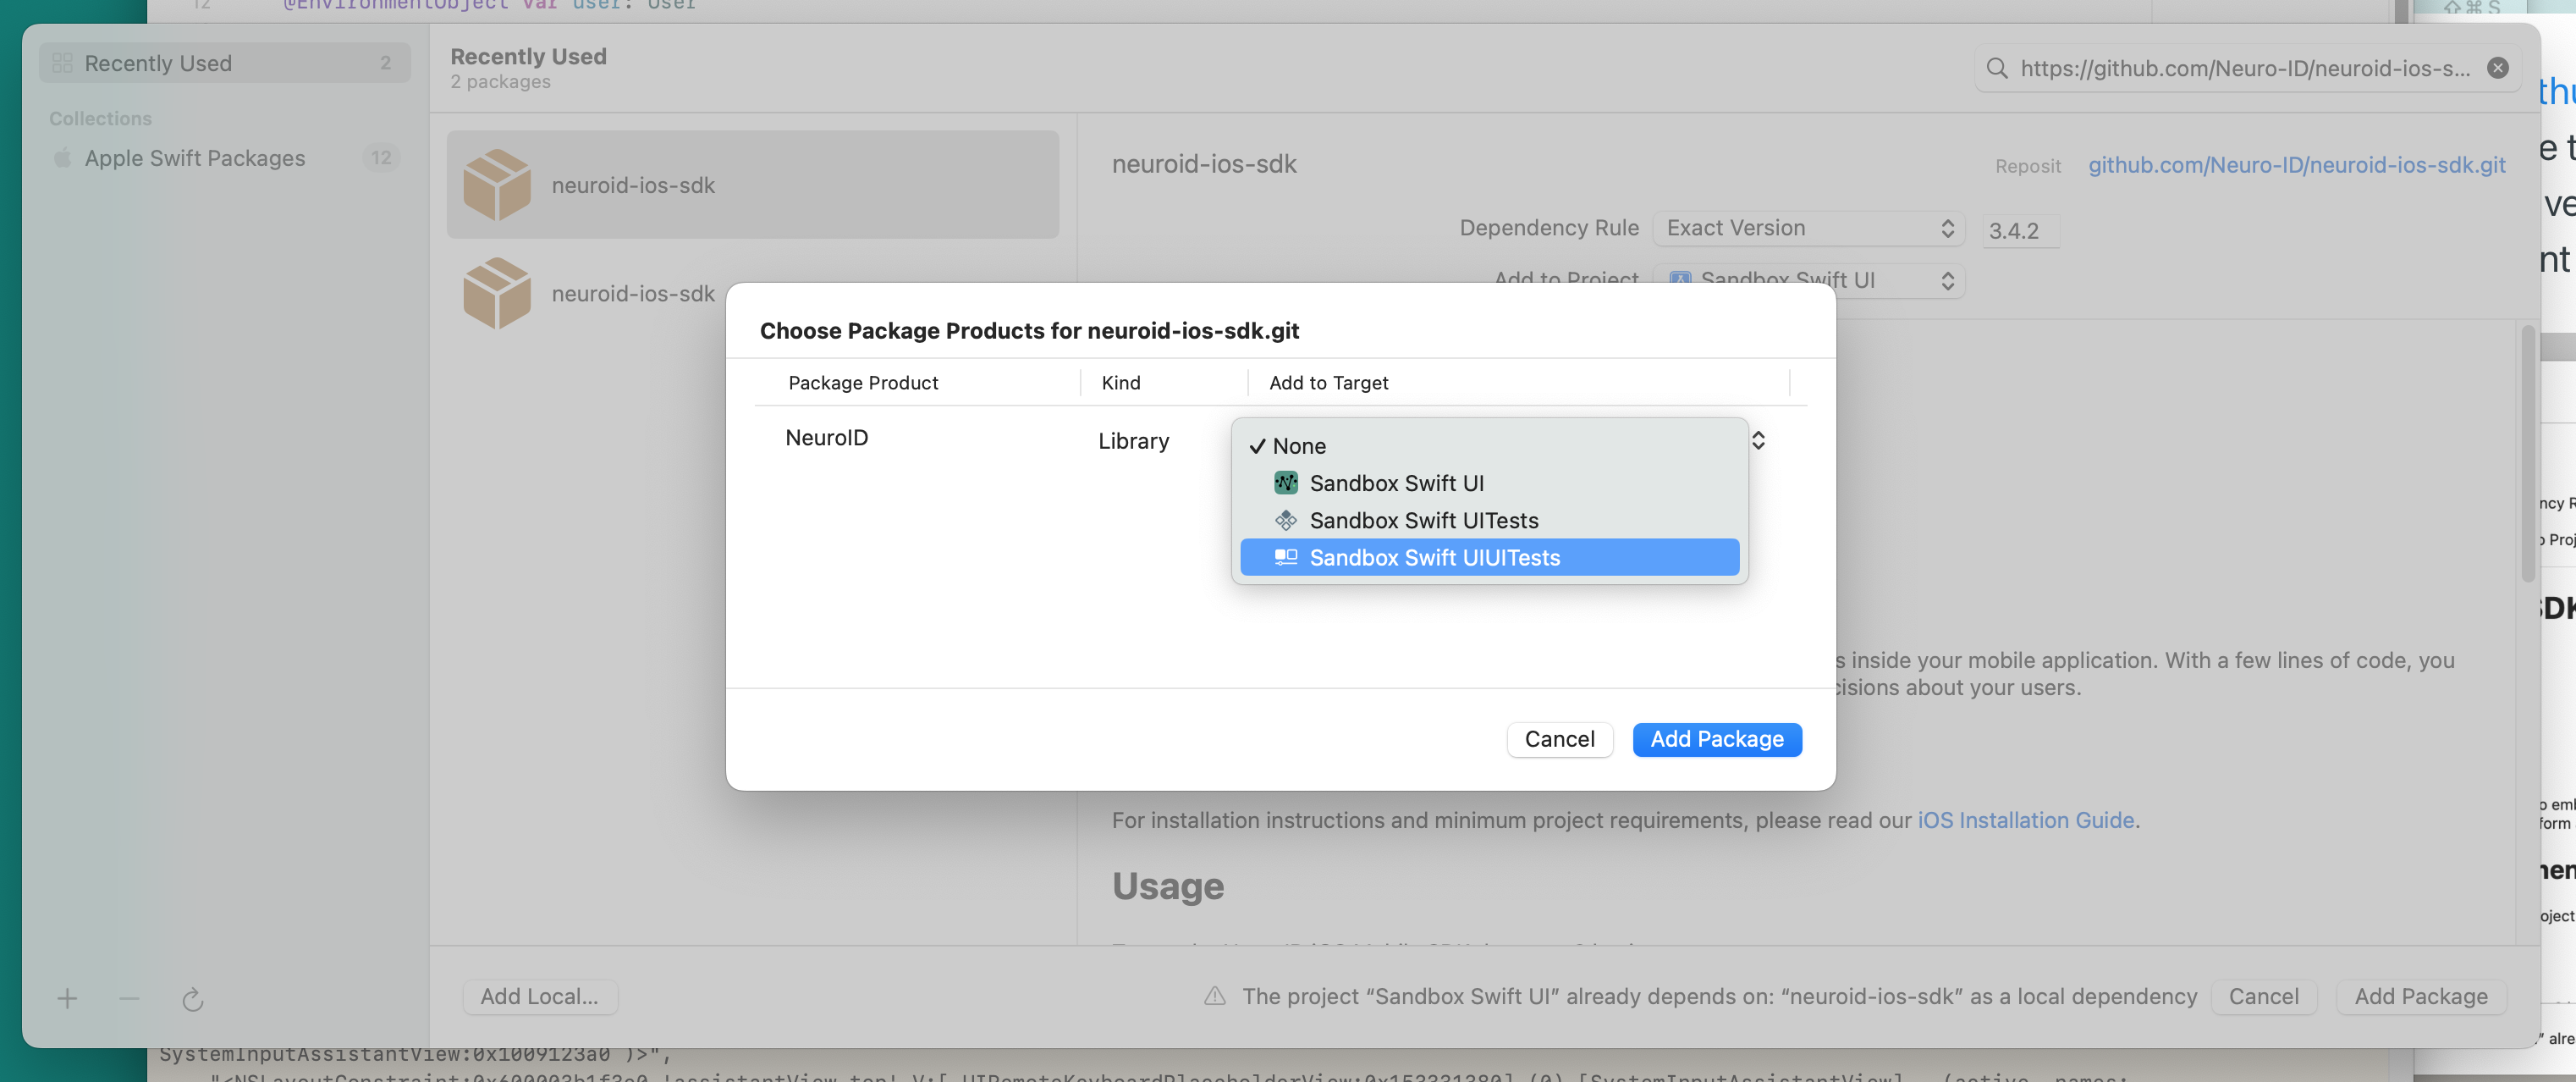
In the Package Products pop-up, select the appropriate target in from the Add to Target dropdown and click the Add Package button. This will clear the product selection screen and return you to Xcode.
You are now ready to integrate the NeuroID SDK.

Initialize the SDK
NeuroID will provide two client keys, one for Production and one for Testing. The setup for both environments is the same, only differentiated by the key.
To initialize the SDK create a NeuroID.Configuration object and set the following parameters:
clientKeyyour client key that was issued to youadvancedDeviceKeyyour advanced device key that was issued to youisAdvancedDeviceflag which is a Boolean parameter used to indicate if you are using the Advanced Device SDK in addition to the standard SDK. Please see the Advanced Device Library section below for more information.useAdvancedDeviceProxyflag is a Boolean parameter used to indicate if you are using the Advanced Device SDK proxy flag. This should be set totrueif you are using the Advanced Device SDK unless otherwise stated.
Once the configuration object is configured, callNeuroID.configure(configuration) on the configuration object. This method takes a configuration object:
// Add this import to each ViewController you will be tracking
import NeuroID

...
 let configuration = NeuroID.Configuration(
                    clientKey: "<client key>",
                    isAdvancedDevice: true,
                    advancedDeviceKey: "<advanced device key>",
                    useAdvancedDeviceProxy: true
                )
// This should be called once, from your app delegate (in iOS Storyboards)
//  or your @main/App struct '.onAppear' block (in SwiftUI)
NeuroID.configure(configuration)
Method Swizzling and Overrides
The SDK uses method swizzling to capture view lifecycles. In the event that you override one of the following functions:
viewWillAppear,viewWillDisappear,viewDidLoad, ordismiss, you must callsuperin the override function.For example:
override func viewDidLoad() {
  super.viewDidLoad()

  // Your Code Here
}
Collection & Link People to Data
The NeuroID SDK provides two collection options:
- Identify at Start - Use this in scenarios where a unique Identity ID is known at the start of collection (or you have chosen to have the NeuroID SDK generate an identifier that you will store).
- Identify after Start - Use this in scenarios where a unique Identity ID is not known from the start of collection but will be known shortly after.
Identity ID/User ID Requirements
To connect NeuroID Analytics results to a specific individual applicant, the Identity ID must meet all of the following requirements:
- It must be the same identifier used to persist an applicant's identity in your own system.
- You may refer to this as an Application ID, an Applicant ID, a User ID, a Customer ID, or something similar. Regardless, you must set an Identity ID that is unique to the applicant and exists in your own system. This value will be used to call the NeuroID API for signals to join with your internal applicant data.
- It must be a string value.
- It must contain only alphanumeric characters, dashes, underscores, or periods.
- It must be a minimum length of 3 characters.
- It must be a maximum length of 100 characters.
- It must not contain any PII such as an email address or passport number.
Single Use-Case Data Collection (existing applications only)
In scenarios where there is a single use-case within the app (e.g. Sign Up or Login), you must choose one of the following collection options.
For Identify at Start sessions, the following commands are relevant:
startSession(userID:String, completionCallback: (StartSessionResult) -> Void)- Note: Do not pass a userID if you would like an identifier automatically generated for you.
- Note: Calling
startSessiona second time will end the previous session and begin a new one.
pauseCollection()- Use this command to temporarily pause the SDK (to avoid collecting sensitive info).resumeCollection()- Use this command if you want to resume from a temporary pause in collection.
// e.g. When a Sign Up button is pressed
NeuroID.startSession("myIdentityID") { startResult in
 print("Session is started: \(startResult.started) with ID: \(startResult.sessionID)")
}

// e.g. When a Continue button is pressed that leads to a PII screen
NeuroID.pauseCollection()


// e.g. When a Continue button is pressed that leads to a screen that should be collected
NeuroID.resumeCollection()
For Identify after Start sessions, the following commands are relevant:
start(completionCallback: (Bool) -> Void)- Note: Calling
starta second time will end the previous session and begin a new one.
- Note: Calling
setUserID(userID:String)stop()
// e.g. When a Sign Up button is pressed
NeuroID.start() { started in
 print("Session is started: \(started)")

// Optional - Call setUserID immediately after start
 NeuroID.setUserID("myIdentityID")
}

// e.g. On another page or later in the flow when the Identity ID is known
NeuroID.setUserID("myIdentityID")

// e.g. When a Submit button is pressed and the session is complete
NeuroID.stop()
Multi Use-Case Data Collection (new applications)
For all new applications and scenarios where there are multiple use-cases, within the same app (e.g. Sign Up and Login), rather than calling start or startSession, use the command startAppFlow. This command takes the Site ID of the specific flow and allows the flexibility to Identify at Start or Identify after Start.
// Command API
NeuroID.startAppFlow(
  siteID:String,
  userID:String?,
  completionCallback: (StartSessionResult) -> Void
)

// Example Usage with Identifier at start
NeuroID.startAppFlow(
  "form_neuro101",
  "myIdentityID"
) { startResult in
 print("Session is started: \(startResult.started) with ID: \(startResult.sessionID)")
}

// Example Usage with Identifier after start
NeuroID.startAppFlow(
  "form_neuro101"
) { startResult in

 // startResult.sessionID will be empty
 print("Session is started: \(startResult.started) with ID: \(startResult.sessionID)")

 // At a later point (either in this callback or on a different page) call setUserID to set
 // the `identityID`
 NeuroID.setUserID("myIdentityID")
}

// Example for an additional flow after calling startAppFlow and starting a session
NeuroID.startAppFlow(
  "form_neuro102"
) { startResult in

 // startResult.sessionID will be the previously set ID (either from the previous startAppFlow
 //  or from the setUserID command)
 print("Session is started: \(startResult.started) with ID: \(startResult.sessionID)")
}
iOS SDK Advance Device Library
NeuroID offers an Advanced Device Library that will collect additional signals.
Installing the Library
iOS SDK 3.4.2 and later
The Advanced Device Library is integrated into our core library so no install is required.
iOS SDK versions 3.4.x but prior to 3.4.2
In your project Podfile on the line following pod "NeuroID", add pod "NeuroID/AdvancedDevice" and re-run pod install.
target 'Your App Name' do
    pod 'NeuroID'
  	pod 'NeuroID/AdvancedDevice'
end
Using the Advanced Device Library
If you set isAdvancedDevice to True when Initializing the SDK, you can skip this section.
To use the AdvanceDevice SDK in your iOS app you need to make the following adjustment to the setup instructions above.
- Locate your
NeuroID.startSession("yourSessionID")command - Replace it with
NeuroID.startSession("yourSessionID", true)orNeuroID.startSession(nil, true).- Passing a
trueparameter indicates you would like to enable AdvancedDevice tracking
- Passing a
let startedResult = NeuroID.startSession("yourSessionID", true)
print("NeuroID started \(startedResult.started) with session ID \(startedResult.sessionID)")
iOS SDK Common Methods
Signal Collection
The NeuroID Mobile SDK silently captures user interactions in a manner that does not block the main thread. All user interactions captured omit any text entered by the user. The SDK never collects sensitive user data.
Examples of iOS interactions we capture:
UIViewControllerlife cycle:viewDidLoad,viewWillAppear,viewWillDisappearUITextField,UITextViewnotifications:textDidBeginEditingNotification,textDidChangeNotification,textDidEndEditingNotificationUIControltouch events:touchDown,touchUpInside,touchUpOutside
Setting the Screen Name
Every time a new screen is presented to the user, use the setScreenName method to associate all captured data with that screen.
Note: It is important to do this after starting the NeuroID SDK and before each screen renders.
// YourAppNameApp.swift
NeuroID.start()

//UserDetails.swift
var body: some View {
    // Your Code
    // ...
    .onAppear {
        do {
            try NeuroID.setScreenName(screen: "UserDetails");
        } catch {
            print("NeuroID SDK is not started")
            return false
        }
    }
    // ...
}
// AppLaunch.swift
NeuroID.start()

// The user detail view
// UserDetails.swift
func viewWillAppear(false){
    do {
        try NeuroID.setScreenName(screen: "UserDetails");
    } catch {
        print("NeuroID SDK is not started")
        return false
    }
    super()
}
Marking Attempted Logins
If NeuroID is configured for a login page then use the attemptedLogin command whenever the login is attempted (through button click or biometric). This should be done regardless of login success. Optionally, you can include the attempted userID. See full API documentation.
NeuroID.attemptedLogin("myLoginID")

// Identifier Not Required
NeuroID.attemptedLogin()
Excluding Views
In circumstances where you want to completely exclude a view and its subviews from any signal/event capturing, pass your views to the excludeView function, as shown below.
let myView = UIView()

// Any subviews in the view passed in will also not be tracked.
NeuroID.excludeViewByTestID(excludedView: myView.id)
Optimizing Your Installation with Field Identifiers
While the NeuroID Mobile SDK installation should already be collecting signals, we recommend one additional step to ensure the best experience when viewing and understanding the data, particularly in the customer portal.
For each input field in your application, we recommend setting a field identifier ( contentDescription attribute (or id field in XML) for Android, accessibilityIdentifier for iOS, or testID/accessibilityLabel attribute for React Native).
The field identifier is used by the SDK in order to name and group interactions.
If you do not set a field identifier the SDK will attempt to do it using fallback placeholders. If no fallback can be found a auto-generated identifier will be assigned.
See examples below.
TextField("Email", text: $input)
    .accessibilityIdentifier("emailField")
    .accessibilityLabel("emailField")
let emailTextField = UITextView()
emailTextField.id = "emailField"
iOS SDK Next Steps
- Contact your NeuroID representative to verify your integration is complete.
Updated 8 days ago
